New to Pinli?
Follow the first-page guide below, from choosing an address through your first preview.
Create your first pageA complete guide to creating a page, working in the editor, publishing, connecting a domain, and understanding your audience. Follow it from the start or jump straight to the task you need.
Follow the first-page guide below, from choosing an address through your first preview.
Create your first pageLearn how blocks, themes, desktop and phone layouts, and page settings fit together.
Use the editorCheck page visibility, plan access, locked blocks, and domain verification.
Solve a problemPick an address people can remember, add the basics, and open the editor.
For a visual walk-through with real dashboard and editor captures, see Create your page with Pinli.
Your board is the starting point for every page in your account.
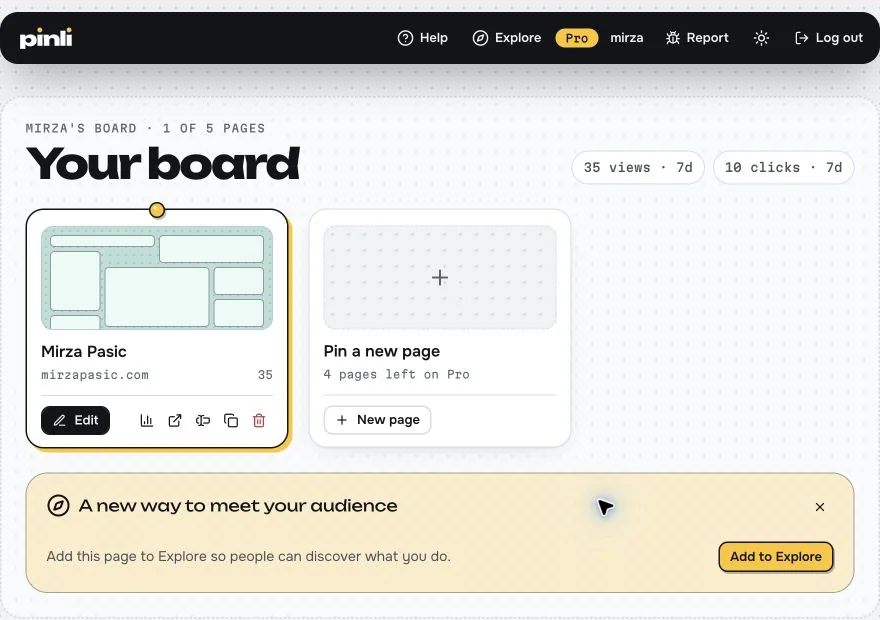
Each page card gives you a route back to Edit your page. The board also shows your page allowance and a recent views summary. Use the dashboard navigation for Analytics, Audience, and Settings.
A page card also has controls to change its address, duplicate, or delete the page. Changing the address breaks links and QR codes that use the old one. Duplicating copies its blocks and settings to a new address, but the copy does not inherit a custom domain or page password. Deleting a page asks for confirmation; check the address before confirming.
If you have more than one page, check the page name or address in Analytics and Audience before reviewing data or changing a setting.
The page itself is your editing surface; the controls around it help you build and preview.
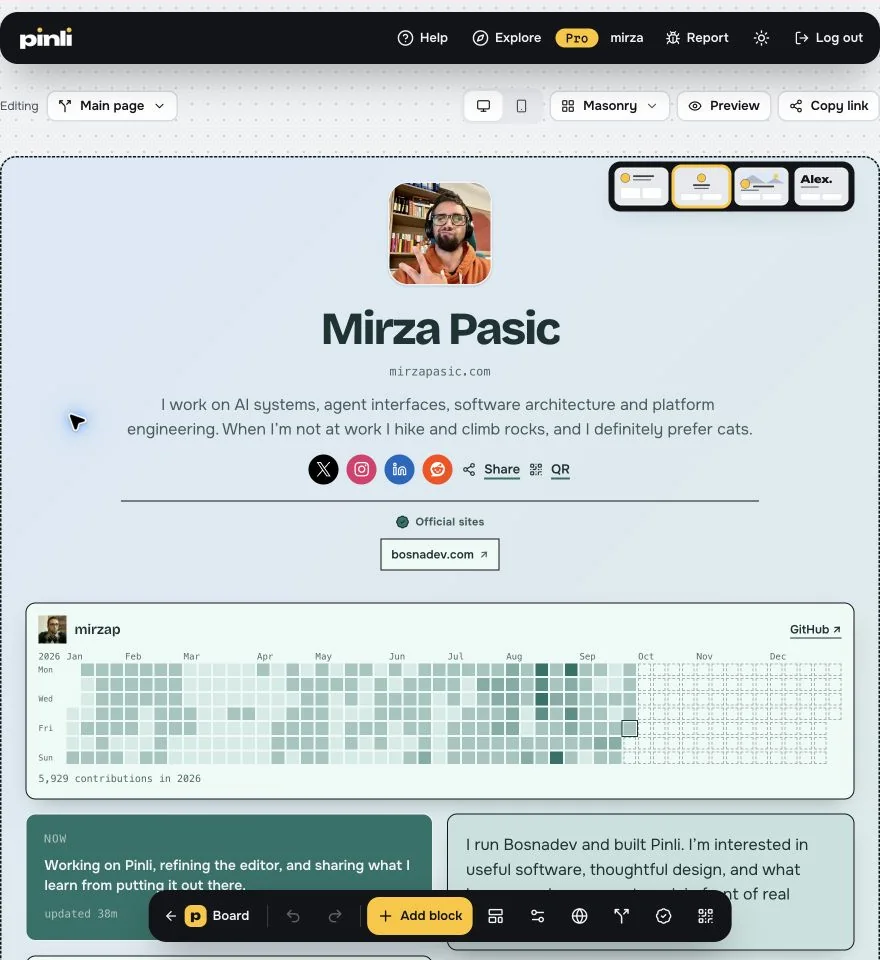
Direct edits to your page save as you type. In the Theme & settings dialog, review the live preview and select Save changes to keep changes to those controls. If you close that dialog with unsaved changes, follow its confirmation prompt.
Blocks hold links, media, text, forms, and the actions visitors can take.
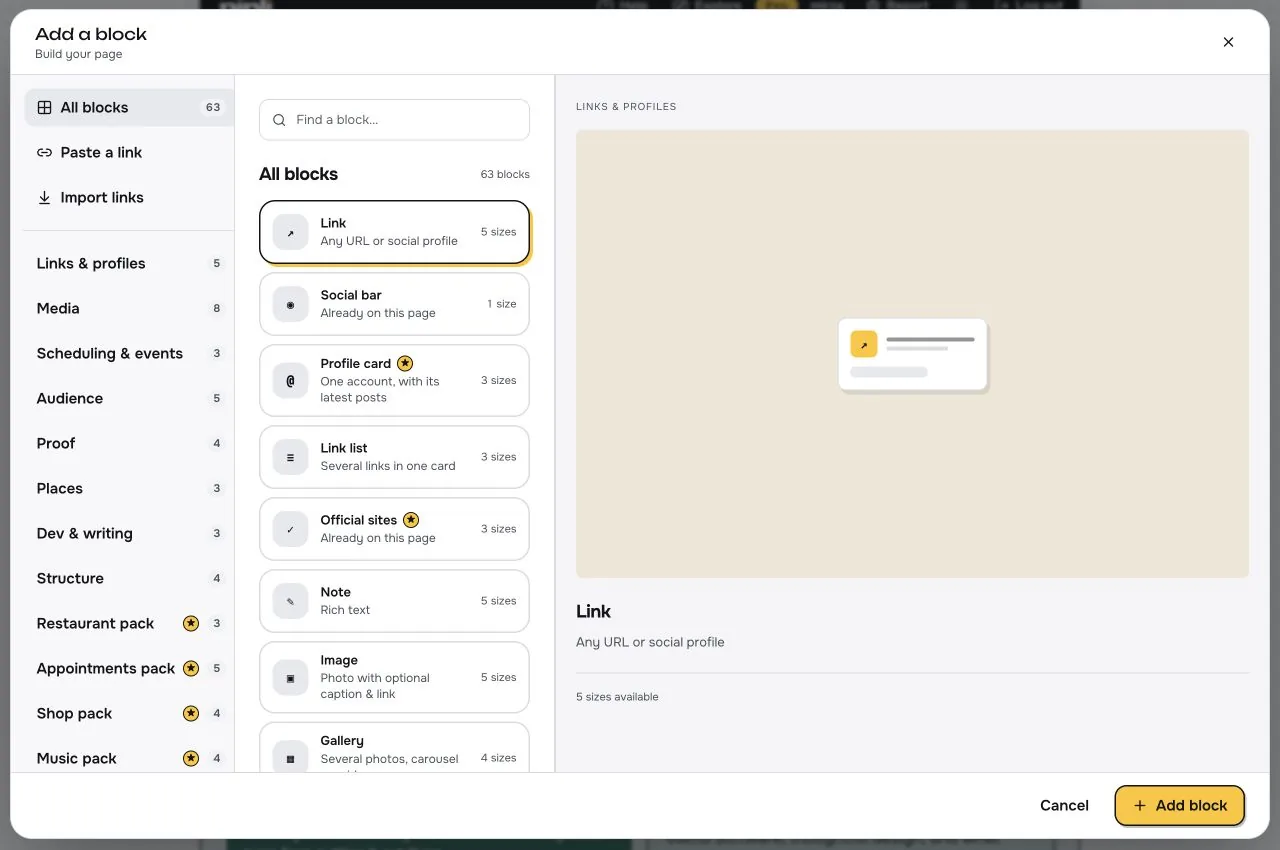
A good first page usually needs a clear introduction, one primary link or action, and a way to contact you. Add more when it helps visitors make a decision. Packs add focused blocks for restaurant menus, appointments, music, stays, and other work. Locked choices show when your plan or pack does not include them.
Choose a starting look, then adjust the details that make the page yours.
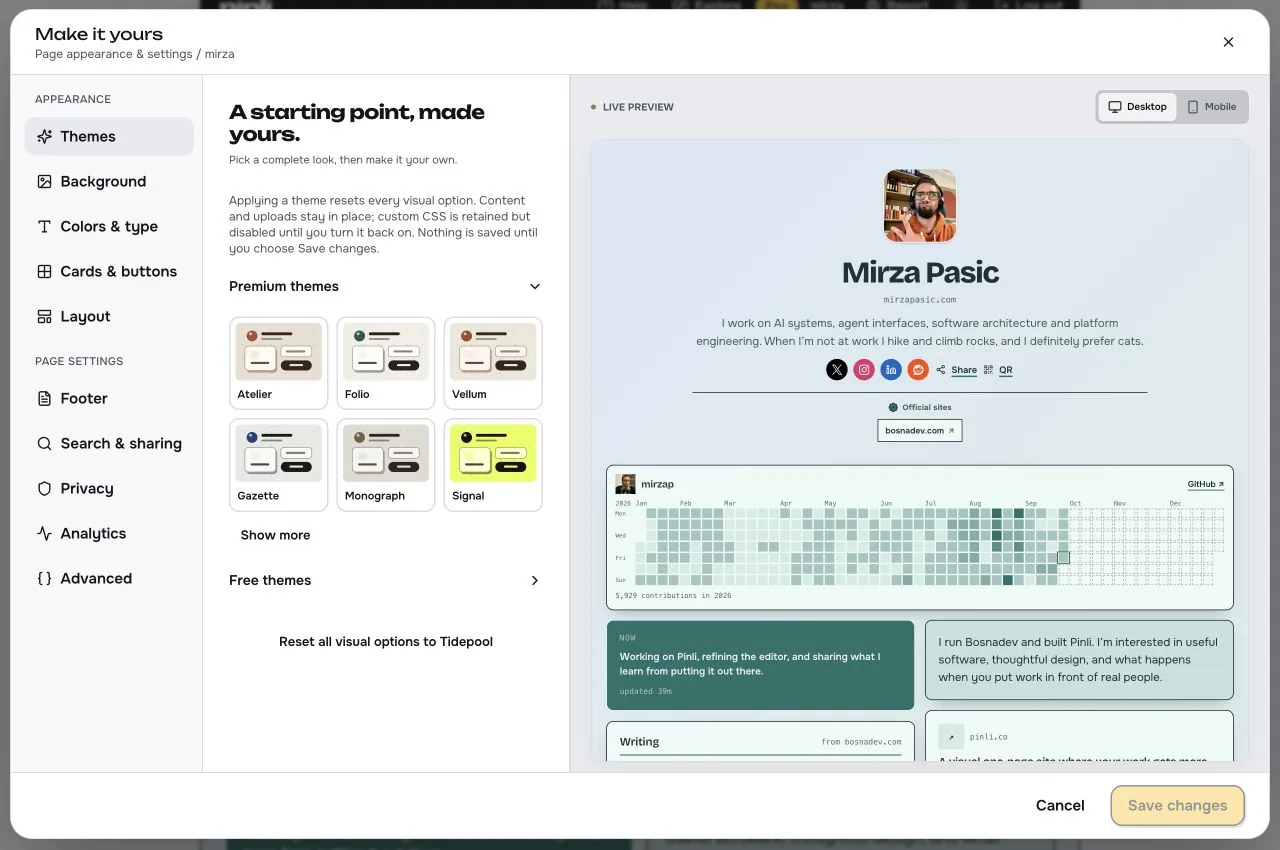
The same dialog also contains Footer, Search & sharing, Privacy, and Analytics. Some themes, appearance controls, and custom CSS depend on your plan; Pricing lists the current feature differences.
A template gives you a layout and example blocks to replace with your own content.
Choose a template when you want a starting structure. Open each example block and add your real text, links, images, or other details. Remove blocks that do not fit your page; add others through the block library.
Some template pages start as an unpublished draft with a Page setup checklist. For each unfinished block, choose Add your content, then Enable completed block. You can also dismiss an unfinished block. Unfinished blocks stay hidden from visitors.
When the draft is ready, select Publish page. If you deliberately publish before every block is finished, confirm that unfinished blocks should remain hidden. A page made through the standard new-page flow may not show this template checklist.
Check the visitor view and page access before you put your link anywhere public.
You can continue editing content at the same address. If you use a template page, its Page setup panel also offers Unpublish page after publication.
Set a useful title and description before asking search engines to discover your page.
New pages start hidden from search. Turning that setting off allows indexing, but search engines decide when and whether to show a page. It does not guarantee a search result or a particular ranking. Keep the page public, make its content useful, and link to it from places you control.
For your Pinli marketing link, our How it works, Create a page, Packs, and Examples pages give visitors more context about what they can build.
Use an address you own with a Pro or Studio page.
Each page can have one connected custom address. Provider instructions differ: Cloudflare can use an apex domain or subdomain, while other DNS providers use a www address with apex forwarding. Follow the records shown for your own domain rather than copying someone else’s values.
Explore is an optional public directory for eligible, published pages.
Joining Explore is free. It adds an Explore link to your page footer while listed. It does not change your password or search indexing settings. If your page is not eligible, the dialog explains what needs attention.
Learn what people visit and what they choose to do next.
Open Analytics from the dashboard, then choose a page if you have several. Review views, daily unique visitors, block clicks, click rate, Explore visits, top blocks, traffic sources, countries, devices, and browsers. Choose a time range to compare activity; available history and CSV export depend on your plan.
To distinguish links you share in different campaigns, add a utm_source parameter to those links. Analytics groups those visits under Campaigns. Platform page links, when used, have their own breakdown.
Open Audience for subscribers, messages, bookings, and orders collected by eligible blocks. Use the page filter when you manage more than one page. Subscriber and message lists support CSV export. To send a newsletter, connect a supported newsletter provider from Audience; Pinli does not send a campaign from the page editor.
If a chart or list is empty, confirm the selected page and date range, then make sure the relevant block is enabled and has received activity.
Your plan sets page limits and feature access; packs add tools for specific work.
Compare Solo, Pro, and Studio for page limits, analytics history, themes, custom domains, and other features. Pro and Studio offer a seven-day trial with a card required. Your selected plan renews automatically after the trial unless you cancel. If there is no active plan after a trial, visitor access to your page pauses until plan access is restored.
Open Dashboard → Settings to view your current plan, manage billing, and see your packs. Available packs can be added to a Pro subscription; Studio includes available packs. Pack changes follow the billing details shown in Settings.
Browse the Packs guide for restaurant, appointments, music, creator, stays, and nonprofit use cases. Shop and the Builder pack are coming soon; the Builder page currently explains the use case.
Keep your profile, sign-in method, and privacy choices up to date.
In Dashboard → Settings, change your full name, choose whether to receive a weekly summary of views and clicks, and review your account email. The email field is displayed there but is not editable.
Email sign-in links are always available. Under Security, select Set or change password to receive a link by email. Saving a new password signs you out on other devices. Under Privacy, set your account-level analytics preference.
Page-level privacy is separate: open that page’s Theme & settings → Privacy to manage its Explore listing, content warning, or password access if your plan includes it. Setting or removing a page password saves immediately.
Work through these checks before changing a page or billing setting.
Open its link in a separate browser session. Check whether a template draft still needs Publish page, whether your plan is active, and whether a page password or content warning is expected. If you changed the address, copy the current link from the editor.
Check Theme & settings → Search & sharing. Turn off Hide this page from search engines, save, and make sure the public page opens. Search engines take time to discover and index pages; there is no instant listing switch.
Open Pricing and Packs to see which plan or pack includes it. Some announced packs and blocks are still coming soon. If a template block says it needs setup, add real content and enable it in the Page setup checklist.
Compare the exact records in the domain dialog with your DNS provider, including any TXT verification record. Remove conflicting records and run Check DNS again after the provider updates. HTTPS setup follows DNS verification.
Use Log in with the email associated with your account. Check your inbox and spam folder for the sign-in link. If you set a password, you can use that; an email link remains another option.
The guides below go deeper on the parts of Pinli you are working with now.